Outreach email
Find overseas companies that match your customer profile, let the AI write each email, send after you approve, and get replies graded and translated into Chinese.
After this chapter: you have sent your first outreach emails and can answer customers from the inbox.
- Step 1
Check whether you have it
Outreach email is turned on separately. If the left menu shows "Leads" and "Outreach", you have it. If not, contact us.
- Step 2
Fill in your sender details
Open "Settings". Under "Sender details", fill in the company name, the company address (a real address that receives mail) and the sender's name, and click "Save". Every outreach email's signature and unsubscribe note use them. US and Australian anti-spam laws require this, and nothing can be sent without it.
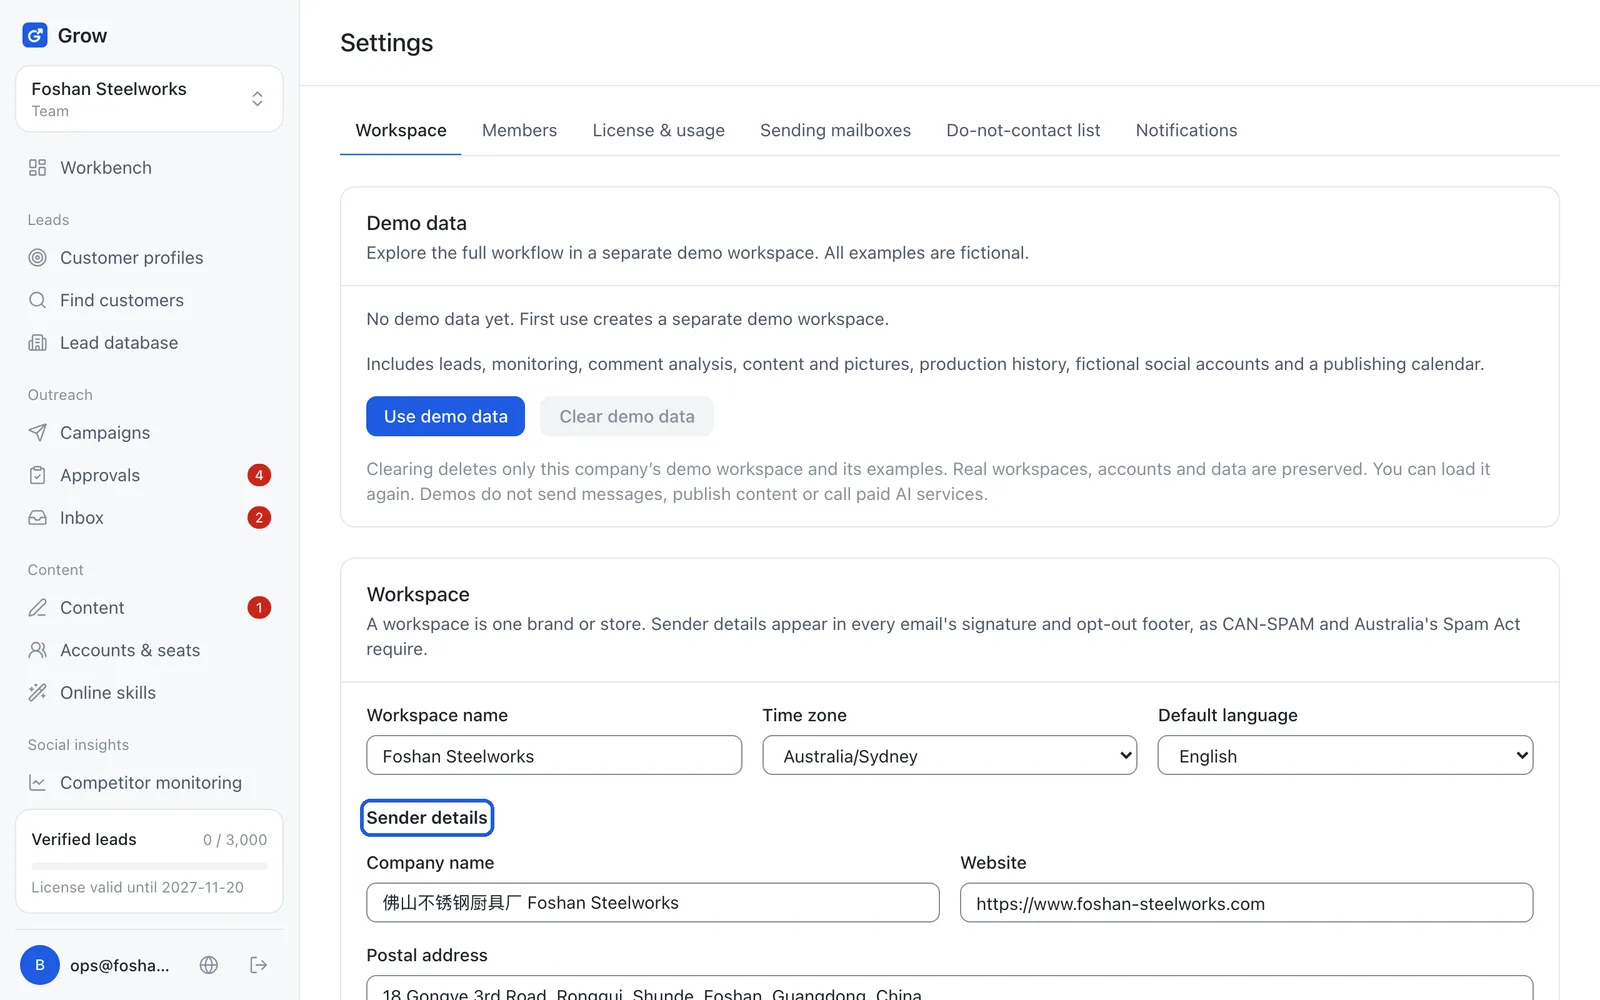
Tip: Only owners and admins can change these.
- Step 3
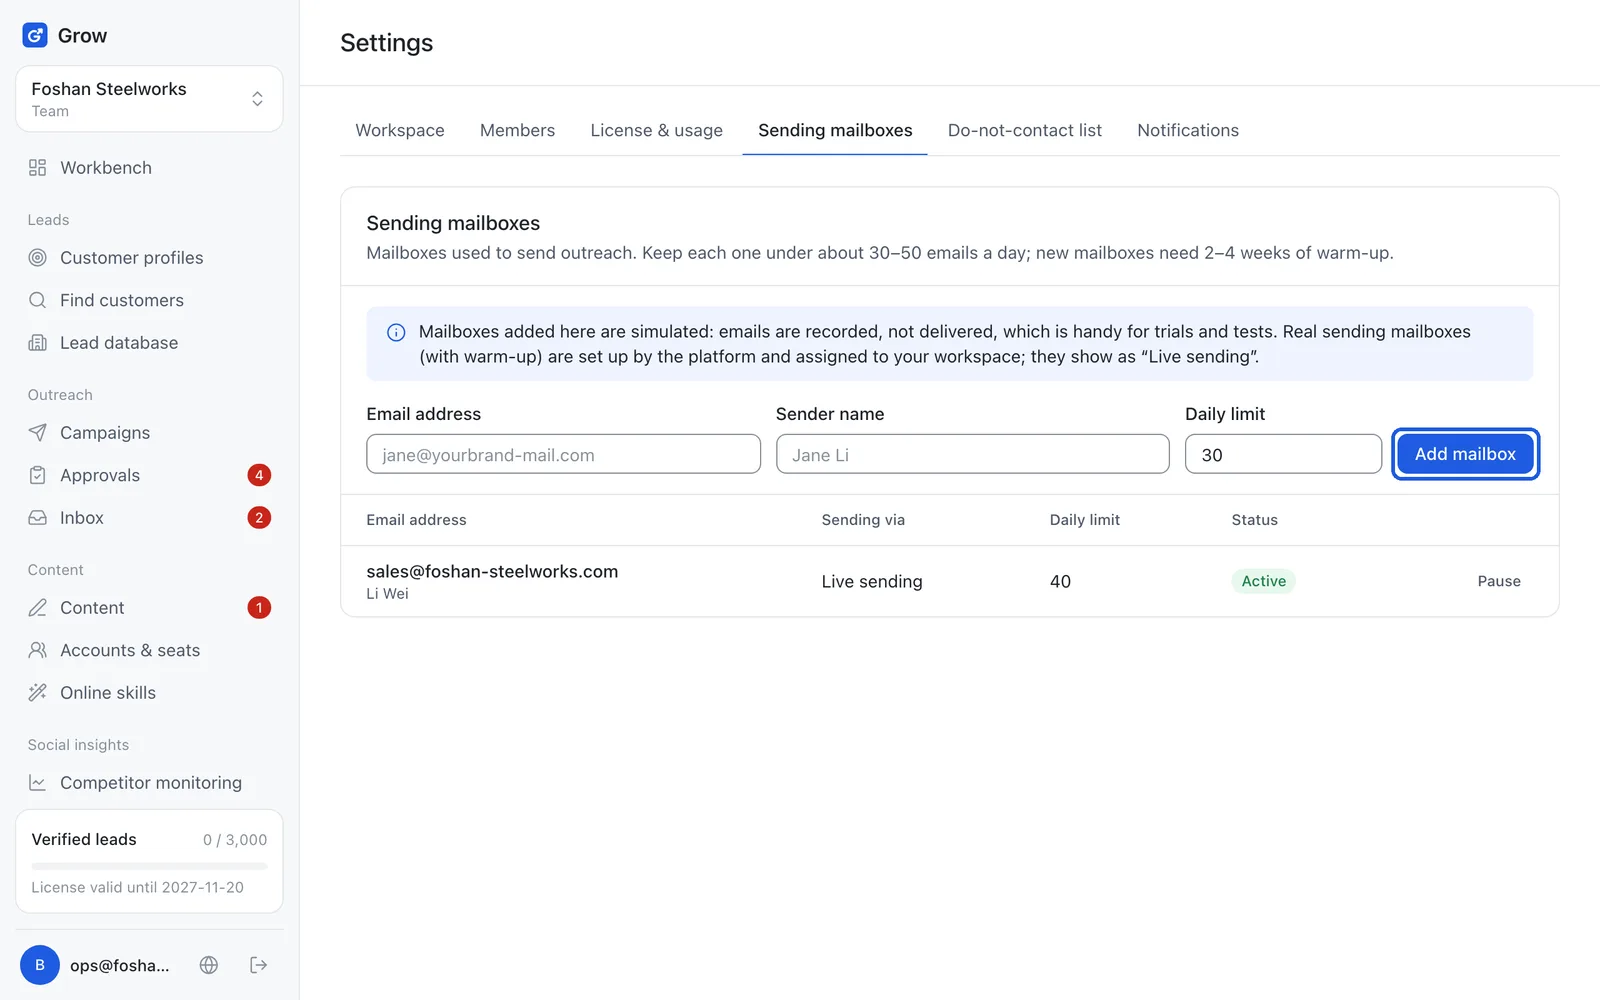
Prepare the sending mailboxes
Open "Settings → Sending mailboxes". Mailboxes you add here with "Add mailbox" are simulated: emails are only recorded, never really sent, which is good for a trial run. Real sending mailboxes are set up by us and "warmed up" first (a new mailbox sends only a few emails for the first weeks so other mail systems trust it and your emails stay out of spam). They appear here once they are ready.
- Step 4
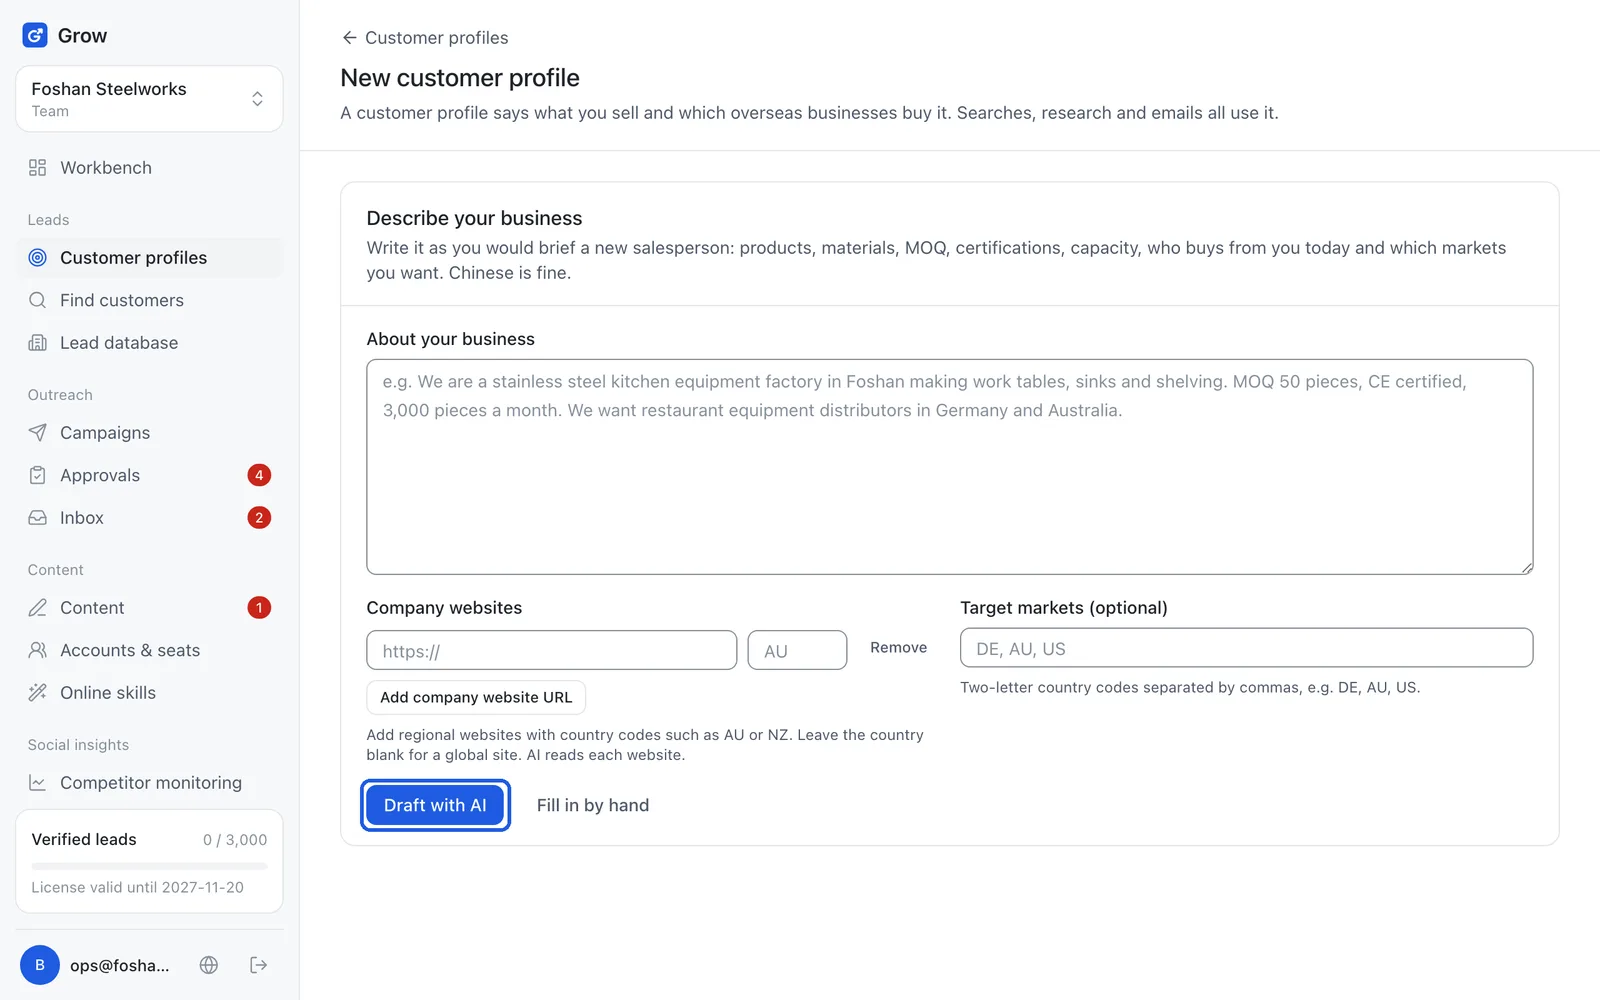
Create a customer profile
In the left menu under "Leads", click "Customer profiles" → "New customer profile". Describe your business as you would to a new salesperson: products, materials, minimum order, certifications, which markets you want. Chinese is fine. Click "Draft with AI", wait about 30 seconds, check it and save.
- Step 5
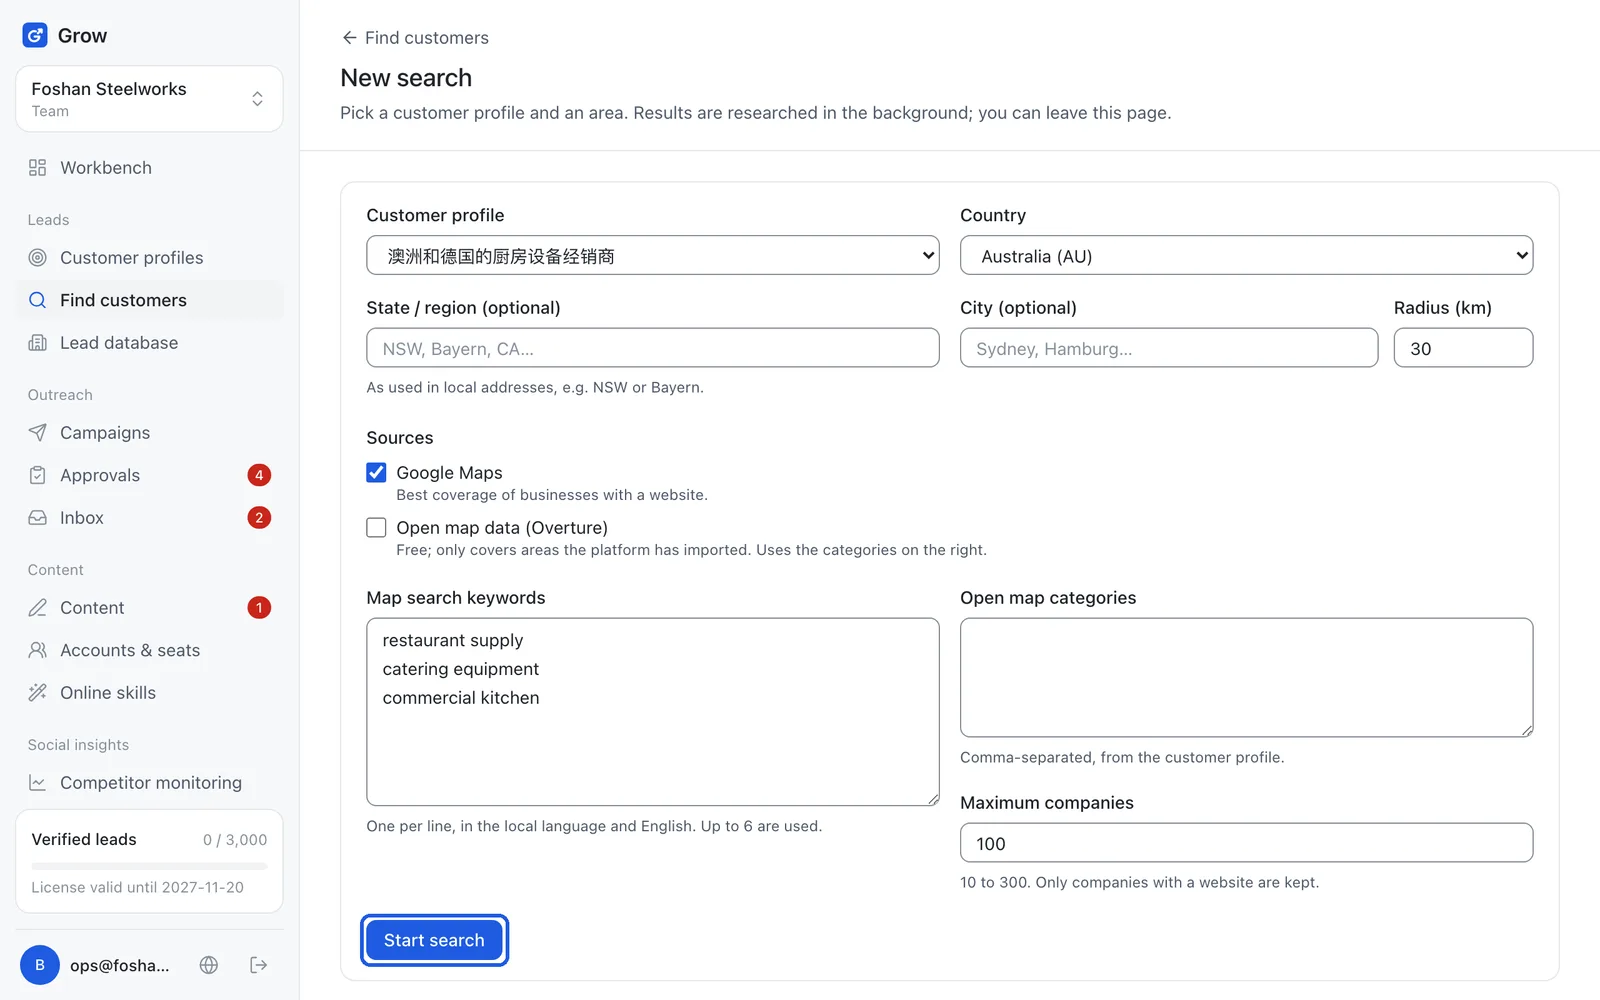
Find customers
In the left menu under "Leads", click "Find customers" → "New search", pick the customer profile and the area (country, city, radius), and click "Start search". The search runs in the background, so you can leave the page. Each company found is researched from its website, scored, and added to the "Lead database".
- Step 6
Create an outreach campaign
In the left menu under "Outreach", click "Campaigns" → "New campaign". Pick the sending mailboxes, sending hours and days, then the approval mode: approve every email, approve the first few recipients, or send without approval. Click "Create campaign".
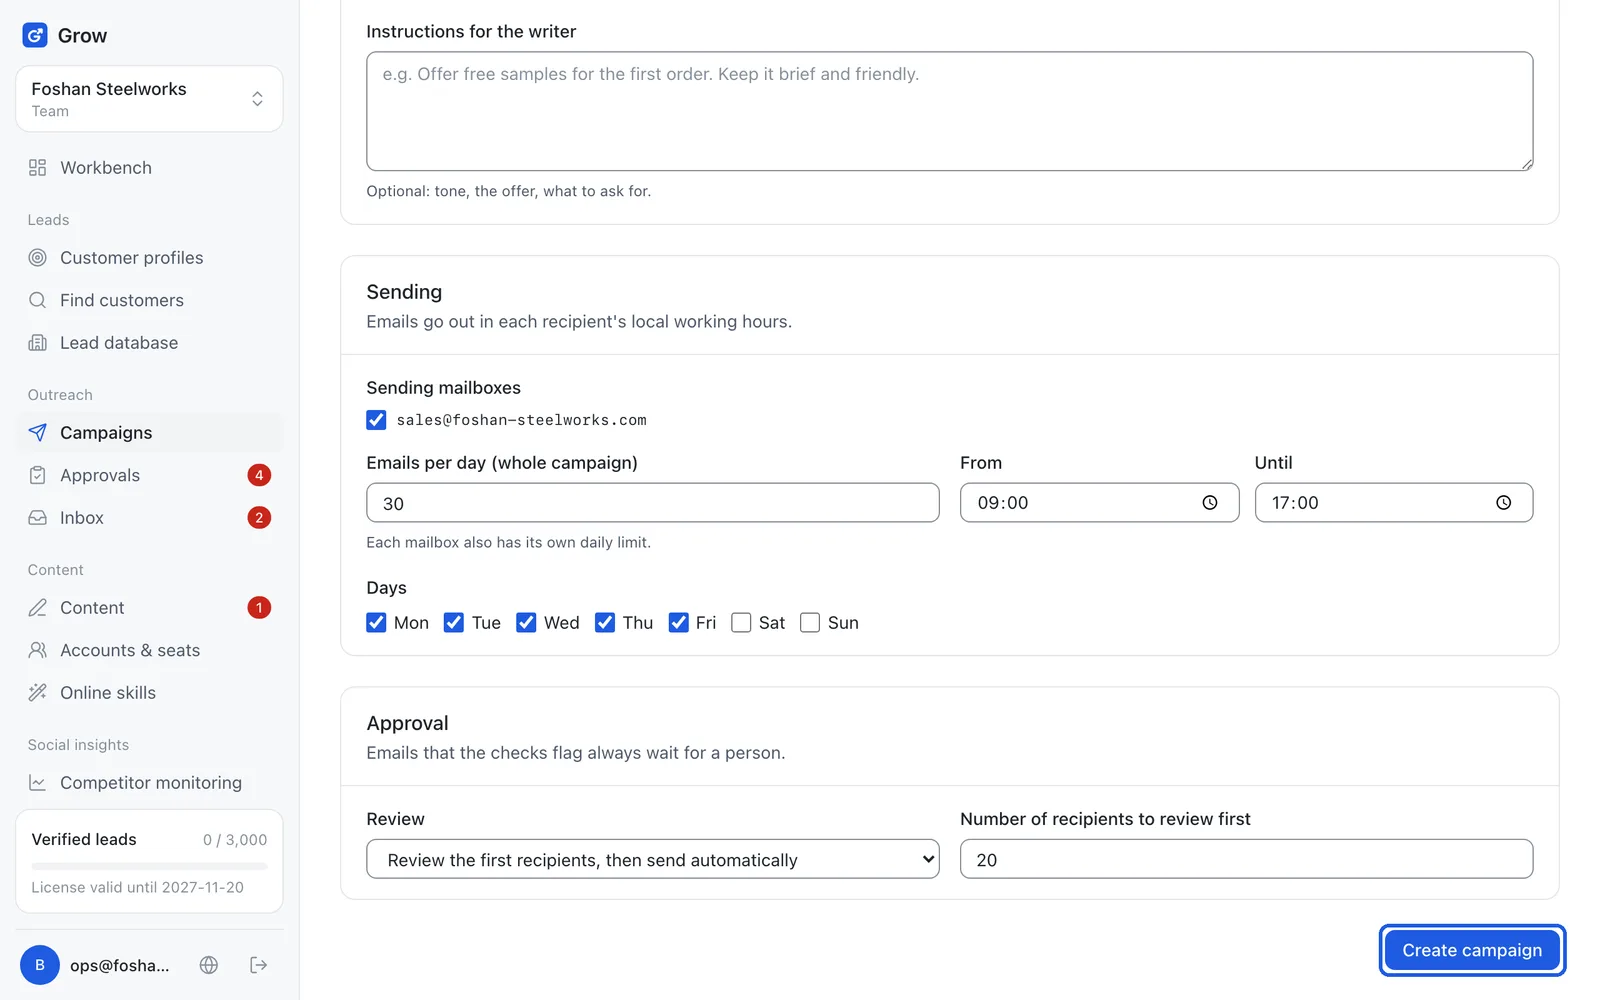
Tip: Emails flagged by the checks always need a person to approve them, whichever mode you pick.
- Step 7
Add companies and start sending
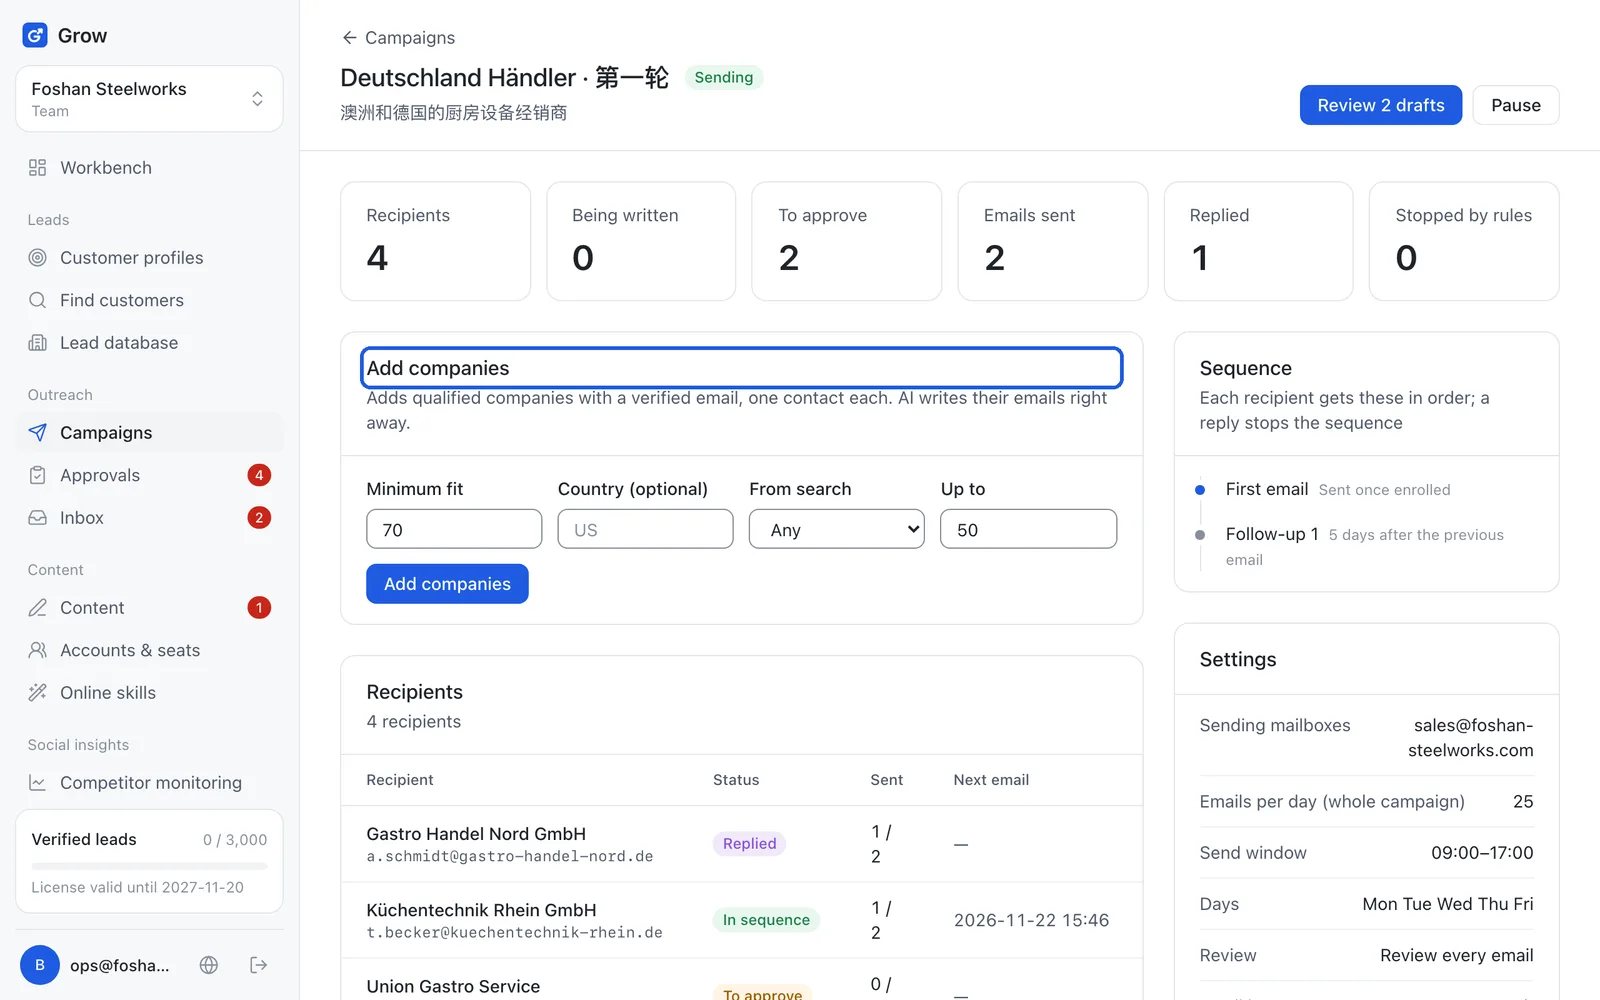
On the campaign page, click "Add companies" to add qualified companies with verified emails from the lead database. The AI starts writing each email right away. Then click "Start sending". Emails go out in the recipient's local working hours, and follow-ups stop when they reply.
- Step 8
Approve in "Approvals"
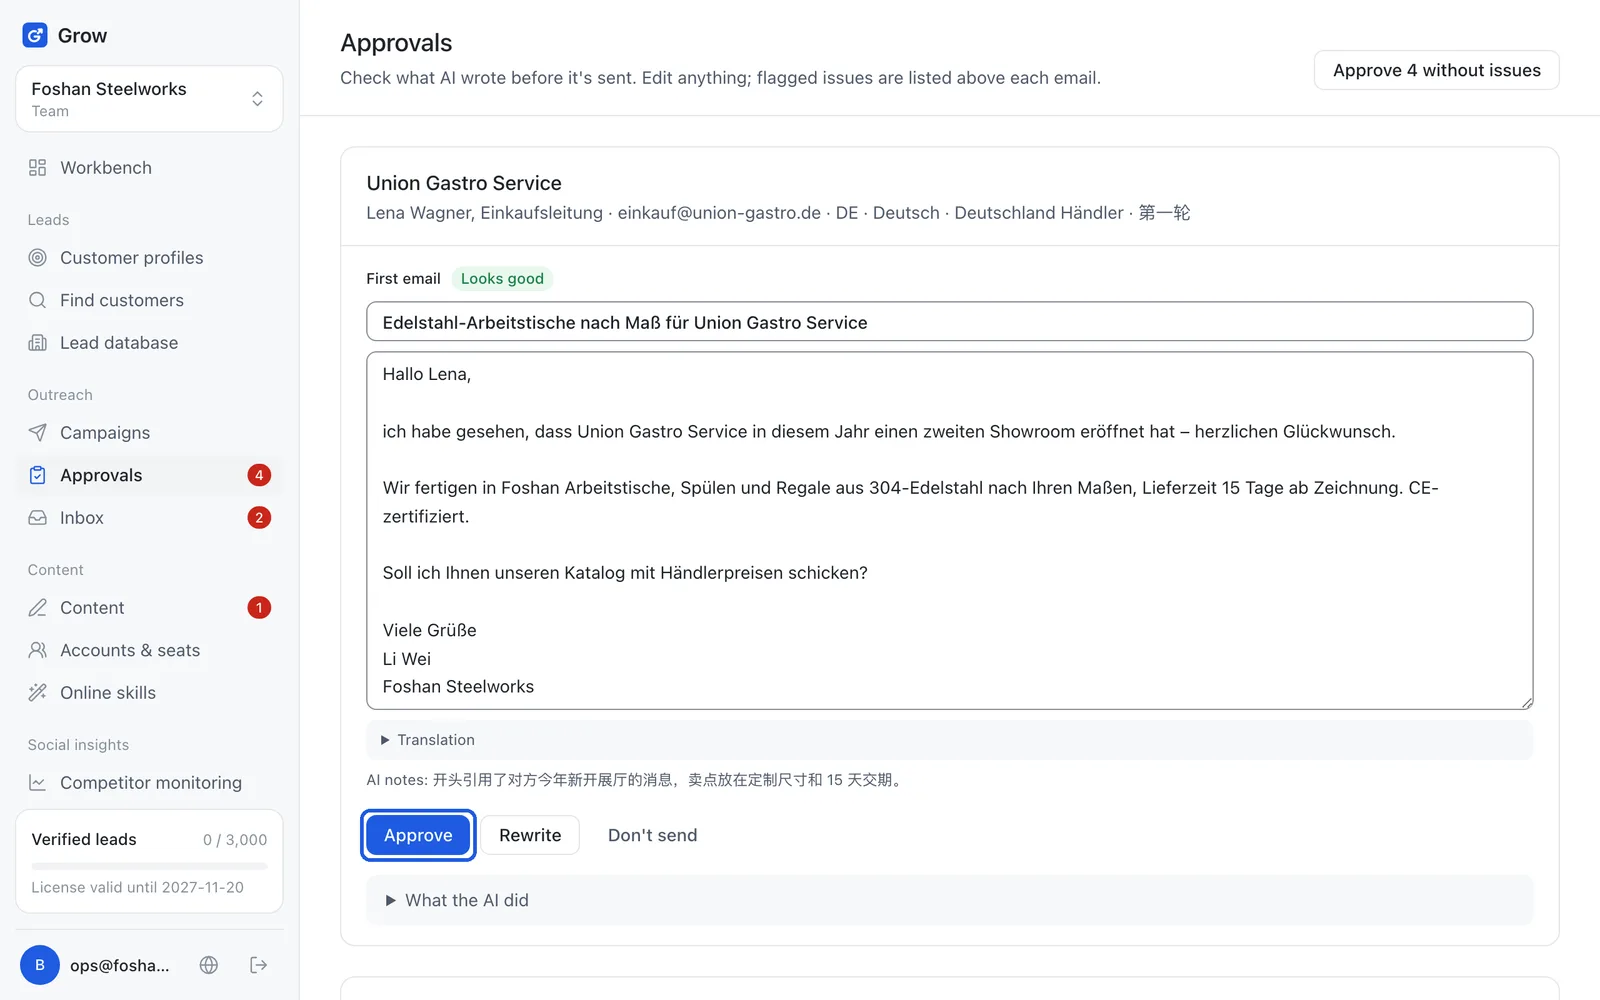
In the left menu under "Outreach", click "Approvals" and read each email the AI wrote. You can edit it directly, and a Chinese translation is shown. Click "Approve" when it is good, or "Don't send" if not.
- Step 9
Reply from the inbox
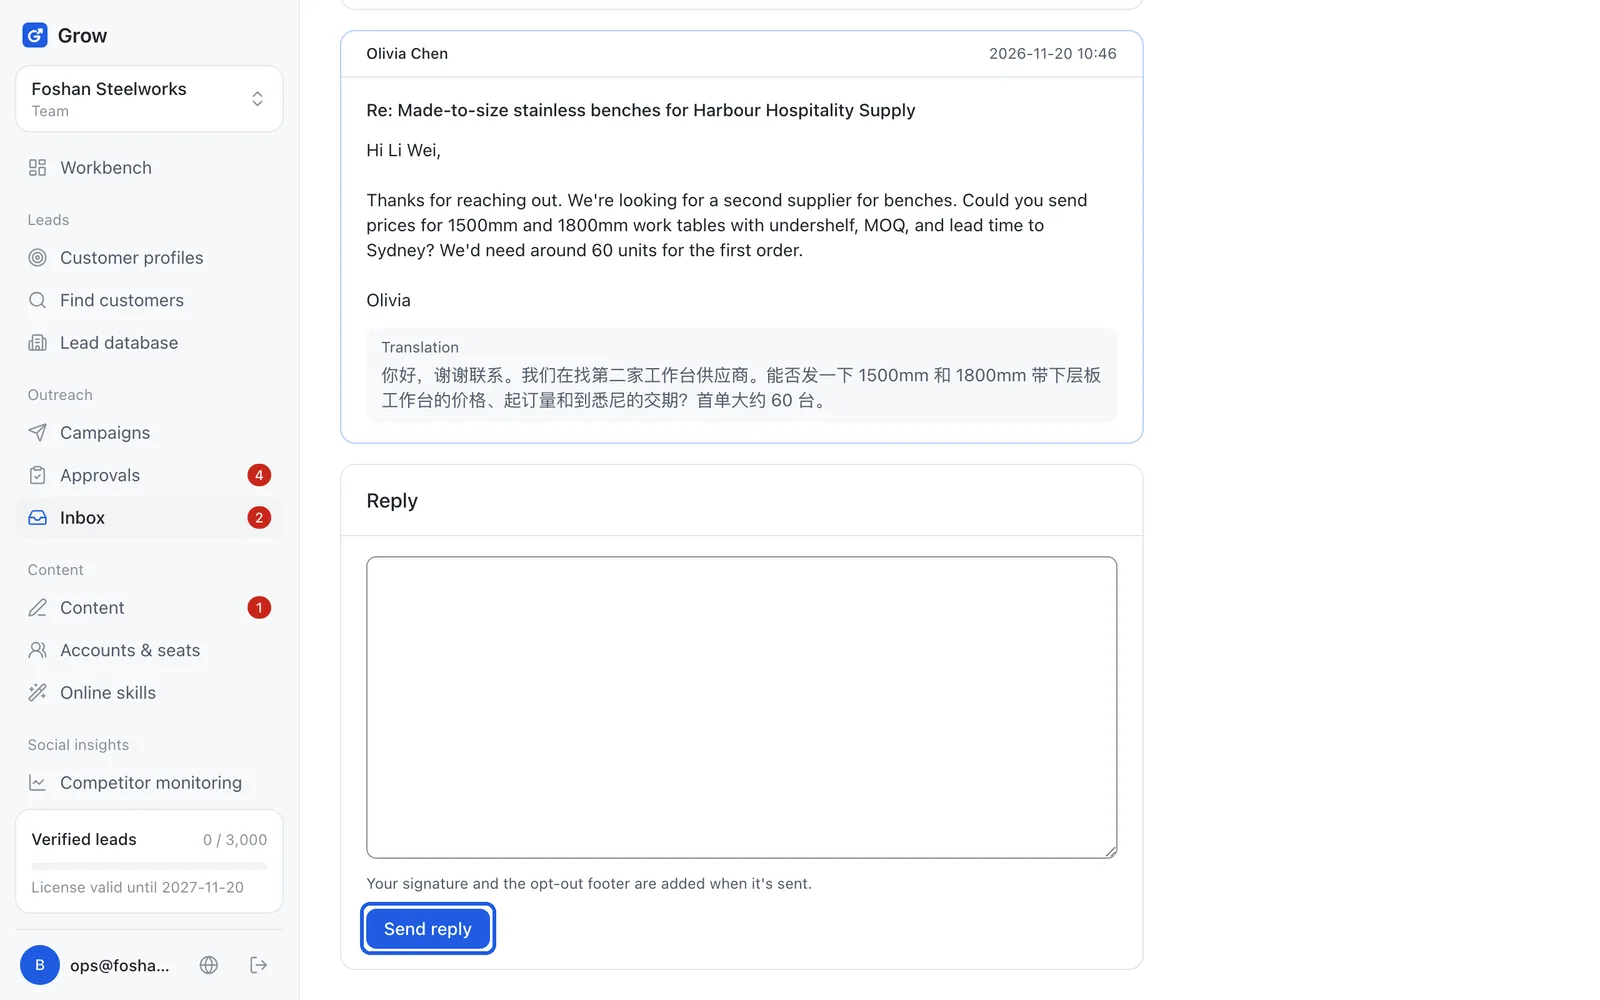
Customer replies arrive in the "Inbox". The AI grades them (A ready to talk, B interested, C later, D no), translates them into Chinese, and for interested replies drafts a reply first. Open the conversation, finish the reply, and click "Send reply". Your signature and unsubscribe note are added on their own.
Still stuck?
Message @JamesAI on X with a screenshot and we will take a look.